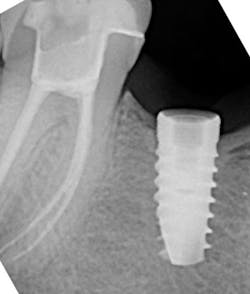
Fractured dental implant screw complications: 3 methods for screw retrieval
Although dental implants enjoy a high survival rate in the literature as natural tooth replacement options, failures do occur.1 Implant complications and failure can be categorized into early failure and late failure. Early failure occurs prior to the insertion of the abutment and crown complex, and late failure occurs after the dental implant screw fixture has been loaded.2 Late failure can be further subcategorized into biologic and mechanical complications. Biologic complications typically involve bacteria-induced problems that result in harm to the soft and hard tissue surrounding the dental implant.3 Mechanical complications usually involve damage to the prosthetic components or implant screw due to occlusal trauma and/or fatigue of the material. These complications can include fractures of the implant body, abutment, crown, suprastructure, and screw body.4
The literature suggests that screw loosening and fracture have the highest prevalence of prosthetic complications over a 10-year period and can be as high as 45%.5 Design of both the implant chamber and screw itself has changed over the years, and screw components have been coated with different materials in order to decrease the incidence of screw fracture.6 Further, various articles have described techniques for preventing screw loosening and/or fracture.7 Unfortunately, once the dental implant screw has fractured, it can be a challenging endeavor to try to remove it from the implant chamber. The aim of this article is to briefly describe three methods of screw retrieval once fracture has occurred.
Dental implant screw retrieval methods
No. 1—Cavitron and instrumentation
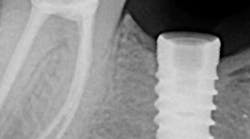
Artery forceps, explorers, spoon excavators, and Cavitrons have been used when the screw fracture occurs in the coronal third of the implant chamber (figure 1). The oscillations from an ultrasonic scaler can gradually reverse out the screw by placing the thin tip of an ultrasonic scaler directly on the top of the screw.8 Adding a lubricant, such as eugenol or mineral oil, can decrease friction and ease clamping to assist in screw retrieval.
No. 2—High- and low-speed handpieces
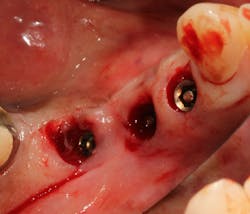
With a high-speed handpiece equipped with a diamond bur, prepare a 1 mm slot across the most occlusal portion of the broken screw fragment (figure 2). Follow this process:
- Hold the handpiece firmly to avoid having the bur inadvertently jump into the implant body. Use an appropriate-sized mini flat-end screwdriver and reverse out the screw. Brånemark systems have a screwdriver like this, or you can purchase one at a local hardware store.
- A low-speed contra-angle handpiece with a one-quarter round carbide bur running in a reverse mode could help spin out the screw. The small round drill acts as a screwdriver and holds the head of the fragment.8
No. 3—Screw retrieval kit
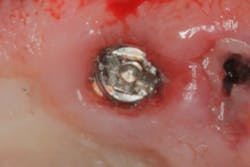
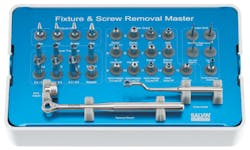
There are many different types of screw/implant retrieval and rescue kits made by different companies. Nobel Biocare, Neobiotech, Osstem (OssVK), BTI Biotechnology Institute, and Salvin Dental Specialties all make these types of kits. The author has found great success with screw retrieval using the Implant Rescue Kit from Salvin Dental (figure 3). This kit is especially useful when the broken screw is fractured in the apical 50% of the implant chamber (figure 4). Following are the steps involved in using this implant screw retrieval kit (figure 5).
- Insert the appropriate drill guide onto the implant platform. Use a contra-angle handpiece with the pilot drill at 1,000–1,250 RPM in reverse with a pumping motion and copious irrigation to create a 1–2 mm deep dimple into the fractured screwhead. This creates a purchase point for the next drill tap.
- Suction the metal shavings and irrigate the area.
- While still in reverse, use the tap drill at 70–80 rpm, which will reverse out the broken screw from the screw chamber.
Scott Froum, DDS, a graduate of the State University of New York, Stony Brook School of Dental Medicine, is a periodontist in private practice at 1110 2nd Avenue, Suite 305, New York City, New York. He is the editorial director of Perio-Implant Advisory and serves on the editorial advisory board of Dental Economics. Dr. Froum, a diplomate of the American Board of Periodontology, is a clinical associate professor at SUNY Stony Brook School of Dental Medicine in the Department of Periodontology. He serves on the board of editorial consultants for the Academy of Osseointegration's Academy News. Contact him through his website at drscottfroum.comor (212) 751-8530.
About the Author

Scott Froum, DDS
Editorial Director
Scott Froum, DDS, a graduate of the State University of New York, Stony Brook School of Dental Medicine, is a periodontist in private practice at 1110 2nd Avenue, Suite 305, New York City, New York. He is the editorial director of Perio-Implant Advisory and serves on the editorial advisory board of Dental Economics. Dr. Froum, a diplomate of both the American Academy of Periodontology and the American Academy of Osseointegration, is a volunteer professor in the postgraduate periodontal program at SUNY Stony Brook School of Dental Medicine. He is a PhD candidate in the field of functional and integrative nutrition. Contact him through his website at drscottfroum.com or (212) 751-8530.
