AS WITH MOST THINGS IN DENTISTRY, partnering with a patient to maintain a stable, long-term result begins with setting realistic expectations. Even a technically excellent treatment with great immediate results will not last in the wrong situation. Fixed implant hybrids can be life changing, restoring patient confidence and transforming one’s life socially, but they could be a poor choice in some patient populations.
Patient selection
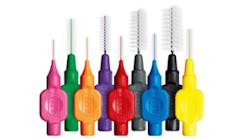
The treatment-planning process should start with a thorough evaluation of the prosthetic plan before entering any surgical phase.1 All too often I see cases or posts online where implants were placed, yet prosthetic compromises are made due to a lack of preplanning. Other considerations are patient attitude and motivation. When deciding on the recommended treatment, a discussion with your patients will determine their level of motivation for ongoing in-office maintenance and home care. I try to be very direct with patients and include in my consent form the need for daily maintenance with a toothbrush, floss, and a water irrigation unit, as well as frequent recall with the office for professional cleaning and maintenance. If patients are unsure about their level of motivation or suffer from poor vision or lack the required manual dexterity, I will recommend another treatment that requires less compliance, such as a nonfixed implant-supported overdenture.
Setting patient expectations
During treatment planning, I have a thorough discussion with my patients about the benefits of All-on-X treatment as well as the alternatives and disadvantages. Medicolegally it is important to document this discussion in chart notes and include these risks in a well-constructed consent form. One disadvantage of an all-on-fixed implant case includes the need for ongoing maintenance, both at home and in the dental office, to guard against peri-implantitis and implant and prosthetic failure. The consent form also covers other risks such as change in speech, potential esthetic challenges, and modified masticatory effectiveness. I’ve found many patients are looking for a silver bullet solution to their ongoing dental problems and expect them to be solved with this significant financial investment, but with minimal effort on their part. Tempering these unrealistic expectations before beginning treatment is extremely important and will pave the way for a successful long-term outcome.
Removal considerations and frequency
Historical literature recommended that implant-supported fixed prostheses be removed regularly for cleaning and prosthetic screw replacement, with frequency suggestions of every two to 12 months. A more recent article in the Journal of Prosthodontics challenged this tradition, and in 2016, the American College of Prosthodontics released a position statement recommending removal of an implant-borne prosthesis only in cases with diseased gingiva, implants, and/or to correct a nonhygienic restoration.2 It should be noted that there is limited scientific evidence on the subject, and these recommendations are based mostly on expert clinical evidence. In accordance with these guidelines, the majority of my implant-maintenance patients receive their prophylaxis with the prosthetic in place. I’ll walk through the steps for maintenance with the prosthetic in place and with removal.
In-office maintenance without removal
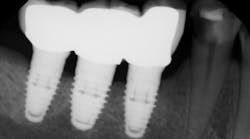
Periodic radiographs are obtained to ensure that the implants remain healthy with abutments tightly connected. This can be accomplished with a limited-field cone beam CT image or periapical films of each implant. The clinical examination includes a review of the patient’s occlusion and the tissue health around the prosthetic and abutments. If all appears healthy, the prosthesis can be cleaned in place using titanium scalers, ultrasonics, an air polisher with glycine powder, or rubber cup with a fine-grit polishing paste.
In-office maintenance with removal: A step-by-step protocol
1. If you were not the dentist who restored the prosthesis, get as much information about it as you can before the appointment. The majority of All-on-X prostheses sit on multiunit abutments, which are universal between implant companies, although the screw connection may be proprietary. Most of the ones that I have encountered are standard 1.2 mm hex or Nobel Unigrip, but there are other styles such as a square drive. Some prostheses are direct-to-implant and will require the proper driver, replacement screw, and implant-specific final torque. These are usually external hex-style connections, such as Co-Axis from Southern Implants, but could also present as tissue-level internal hex implants placed parallel with nonengaging abutments integrated into the prosthetic bar as one piece.
2. Obtain periapical radiographs or a cone beam CT scan of the implants. This will allow you to check for healthy integration of the implants and complete seating of abutments and the prosthesis. If the prosthetic is being removed, most likely there is an issue with gingival health, the implants, or the prosthesis that should be reviewed and documented radiographically.
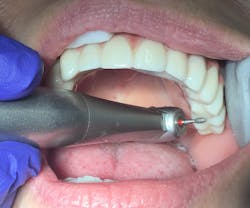
3. To remove the composite plugs over the screw hole, I prefer to use a round-ended tapered diamond bur in a high-speed handpiece. This prevents gouging of the screw-hole wall and will limit damage to a screw head if you accidentally encounter it. Based on the radiographs, you can estimate the length of each screw channel and choose a safe depth that won’t reach or damage the screw head. After removal of the composite, the protective cotton or Teflon barrier can be removed with an explorer.
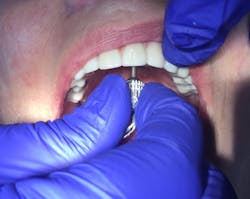
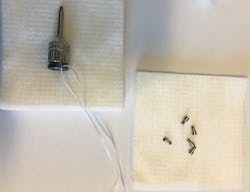
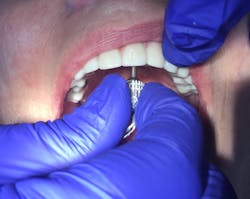
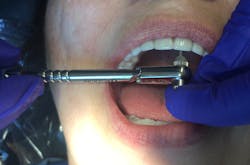
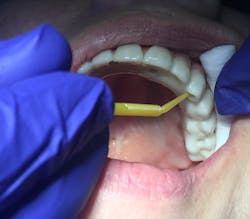
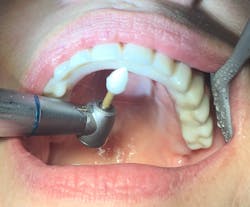
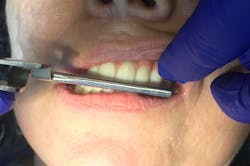
4. Because the prosthetic screws are extremely small, I like to ligate my prosthetic driver with floss or use a right-angled driver in difficult-to-reach areas (figures 1 and 2). This protects against dropping the driver while focusing on the tiny screws. While removing the screws, take note of whether any are loose, as this may indicate a prosthesis that isn’t passive or has occlusal interferences. As you remove each screw, have your assistant collect them in a small cup so they are all accounted for.
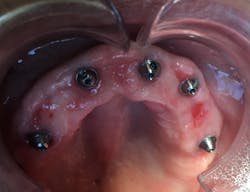
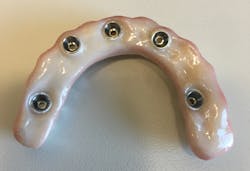
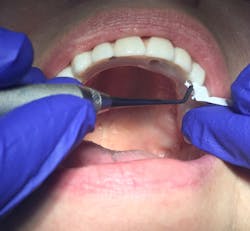
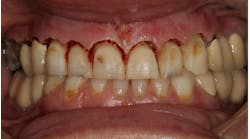
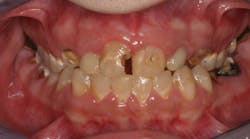
5. After removal of the prosthesis, check the tissue-prosthesis interface. The gingiva should be a healthy coral pink. Any areas with impacted debris should be noted. Any spots with red or bleeding gingiva represent areas where there may be insufficient contact and pressure between the prosthesis and gingiva (figure 3). Inspect the intaglio surface of the prosthesis. The entire surface should be convex with no areas to trap debris (figure 4). If there are signs of poor contact or the prosthetic is uncleansable, it should be corrected.
6. Put the prosthesis in a plastic locking bag with tartar-removal solution, and then place it in an ultrasonic bath for cleaning.
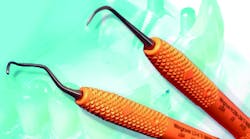
7. Each multiunit should be gently scaled to remove any of the larger hard deposits with implant-specific titanium scalers. For smaller deposits, a glycine powder air polisher or rubber prophy cup with low abrasivity pumice may be used. Inspect each multiunit to ensure that the screw hole and conical mating surface are clean and undamaged.
8. I like to gently probe around each abutment and ensure tissue is healthy with no inflammation or exudate. If there are signs of gingivitis, you may use a laser to decontaminate and rinse with chlorhexidine.
9. After removing the prosthesis from the ultrasonic bath, it should be cleaned and rinsed with a denture brush and soaked in chlorhexidine before reinsertion.
10. When replacing the prosthesis, it is again recommended to use a ligated implant screwdriver to avoid an aspiration incident (figure 5). Using new multiunit screws, place each small screw on the driver before going to the mouth. While holding the prosthesis in place, it is often necessary to have the patient gently bite into it to compress it back into place for several minutes before reinsertion of the prosthetic screws. This is due to tissue rebound that occurs when the prosthesis is out of the mouth.
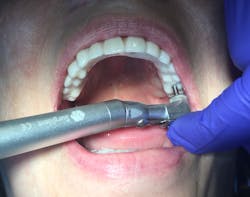
11. After hand tightening, each screw is torqued to manufacturer specifications; usually only 15 N-cm is needed (figure 6). Overtightening these small screws can lead to fracture and a huge headache for removal and replacement.
12. Next, I pack each access hole firmly with Teflon tape and have my assistant trim the tape when the hole is ¾ filled (figure 7). It is important that you pack the Teflon firmly, as loose space below the composite plug will cause it to fracture and lodge into the hole with occlusal forces over time.
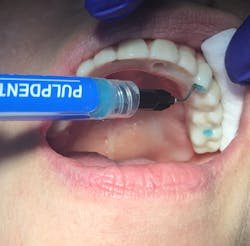
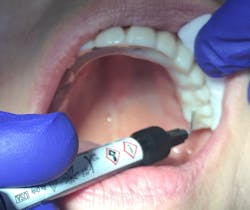
13. Then, I isolate with cotton rolls, etch with phosphoric acid briefly only to cleanse any saliva, place a universal bonding agent, and light cure (figures 8 and 9). I fill the access with flowable composite (I find flowable to be faster and easier), which adds up when you’re filling multiple holes (figure 10). When curing the composite, ensure that it is cured from multiple angles, as the narrow hole can block out light if the light is held at the wrong angle. Typically, I isolate half of the arch, do all bonding and flowable, and then repeat on the other side. I slightly overfill each hole to ensure there are no gaps between the composite and screw access hole.
15. I prefer a lingualized occlusal scheme over a mutually protected occlusal scheme (which works well for natural teeth), as it concentrates too much lateral force in the canine areas of the prosthetic, which can lead to fracture typically between the canines and lateral incisors. The occlusion is checked for bilateral posterior contact in centric relation, which ideally is coincident with maximum intercuspation. If there is a slide, it should be smooth with no occlusal interferences. Lateral excursive movement should be in group function in the molars and premolars, and protrusive movement should be balanced (figure 13). If the prosthetic is opposing natural teeth, this isn’t always possible, but selective odontoplasty will often allow removal of interferences. Any interferences or uneven loading in excursive movement will likely lead to screw loosening and potential fracture of the prosthetic.
Conclusion
Fixed implant-supported hybrids can offer a life-changing solution to the properly selected patient. Preventive maintenance of these protheses is extremely important for dental implant health and longevity and will only become more important as it continues to gain popularity. Involving the patient in this process before you begin treatment will increase the likelihood that they will follow through with ongoing care after they are restored. I have found that many dentists shy away from this task due to inexperience or fear of the unknown. Hopefully this information will remove some of the mystery and help create a win-win for you as a provider and for your patients. Not only can these ongoing maintenance visits be a financial boon to your hygiene department, but they can offer an ongoing source of internal referrals as your patients successfully maintain a healthy result over time.
References
1. Gowd MS, Shankar T, Ranjan R, Singh A. (2017). Prosthetic consideration in implant-supported prosthesis: A review of literature. J Int Soc Prev Community Dent. 2017;7(suppl 1):S1-S7. doi:10.4103/jispcd.JISPCD_149_17.
2. Bidra AS, Daubert DM, Garcia LT, et al. Clinical practice guidelines for recall and maintenance of patients with tooth-borne and implant-borne dental restorations. J Prosthodont. 2016;25(suppl 1):S32-S40. doi:10.1111/jopr.12416.
Editor’s note: This article originally appeared in Perio-Implant Advisory, a chairside resource for dentists and dental hygienists for issues relating to periodontal and implant medicine. Exclusive content from an academic perspective centers on complex care, solving clinical complications from a team-based approach through interdisciplinary management.
