The crown the lab made doesn't fit: Why does this happen?
Part 1: High bites
In dental prosthetics, there are many reasons why a dentist may send a laboratory crown back to the dental lab for a remake. This article is the first in a series. We will start with the subject of high bites. Unfortunately, both dental technicians and dentists tend to point fingers and get defensive when problems arise. But there are many reasons why a restoration may not fit.
Read part two of this article: Why do we get crowns that don't fit?
Materials
Conventional impressions—First, let’s talk about traditional crown and bridge procedures of impression material, stone, investment, alloy, and divestment. In this procedure, the impression material is a mass-produced product that has expansion issues. If it is subject to an inaccurate mixture of parts A and B in the dental office, the effects of weather, abnormal office temperature, or poor storage conditions at the supply house or the dentist’s office, the result will likely be in the form of distorted or inaccurate impressions.
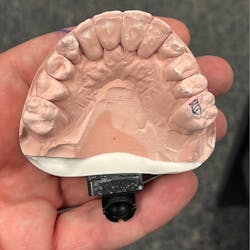
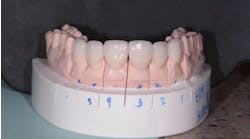
After an impression is taken, it is in danger of being exposed to high levels of hot and cold from the courier service. The lab will pour a stone material that has its own expansion issues and is subject to the same issues of mass production, transportation to the supply house and the lab, and exposure to the changing temperatures and general humidity in the lab. Again, this can result in distorted or inaccurate dyes or impressions (figure 1).The same goes for the investment used by the lab. The alloy used to cast in relation to the investment can sometimes be too tight or too loose after solidification. And finally, divesting, especially using a sandblaster, can wear away and affect the fit of the restoration.
In traditional dental procedures with CAD restorations, impression material, stone, material—zirconia, lithium disilicate, polymethyl methacrylate (PMMA), etc.—and sintering, the puck that is being milled has its own expansion rate and, again, is mass produced. There are so many zirconia products on the market today from all over the world. They have different properties and expansion rates that are subject to many variables. The sintering processes can affect fit in the same way that a casting can be too tight after using too much water.
Expired impression material—The material used is important. That also goes for the impression material and the stone. Years ago, I had a recurring issue with a dentist client. For weeks, we could not figure out what the problem was with his work.
One day, we got a new impression to pour for the master model and the counter model. It was then that I noticed the counter model poured in my lab was nothing like the one in their dental office. The problem turned out to be expired alginate material and mounting plaster, instead of stone, that had been poured into it. The plaster would shrink. We could get what looked like a correct mounting, but the teeth were dimensionally smaller, therefore the bites were off.
Once we addressed this, our problems were over. The culprit was expired impression material and incorrect lab stone.
Digital impressions—
In fully digital dentistry—with scanning, print modeling, material, and sintering (infiltration)—we have intraoral scanners that, in theory, should be on the money every time. Unfortunately, sometimes there are inaccurate scans due to saliva, blood, uncalibrated scanners, dirty mirrors in the handheld scanner, and just plain old software. Printers have different settings; just like a regular ink printer or monitor that has high resolution and lower resolution, so do printers. A printed model is subject to many issues, not unlike pouring a stone model. Where the material is stored, the age of the material, the location of the printer, and who does the final cleaning and curing of the model can all affect the model.
Digital impressions also rely on having the patient bite down, with the scanner placed between the check and the clenched teeth. Is this always the correct bite? The number of teeth involved, the correct bite, the patient's ability to put themselves into the correct bite, the way the scan is taken, and the accuracy of the scan all can vary, in turn affecting the result in the final restoration.
Model articulation
The second reason we get high bites is when the dental models were misarticulated. It could be that the preparatory technician did not use the supplied bite to mount the model. It could also mean that the bite taken was incorrect or that the triple tray was distorted. When you think about a plastic tray that is used for impression, counter, and bite, taken in one shot, how accurate could it really be? After all, you can’t count on every patient to bite 100% correctly into the trays. Many times, patients bite through the material or chew it. This results in a distorted occlusal of the model, thus inaccurate mountings, and finally leads to high bites.
Poor temporization
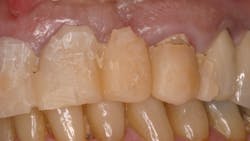
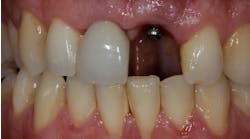
I knew a dentist who would prep a tooth, make a chairside temp, and send the impression for final plasterwork. We would return the model for the dentist to trim the die. Next, we would cast a single coping that the dentist would try in for fit and return to the lab for porcelain application. Then, it would go back and forth again for a bisque bake try-in. Altogether, the crown could take a month to six weeks for completion. The problem was that the temporary was not in occlusion from the start. By the time the bisque was tried in, the dentist would grind out most of it. The tooth was erupting while the crown was being made. A well-made temp should be in correct occlusion to prevent this from happening. Quite often, it is just the temp that is the reason for high bites and tight contacts (figure 2).Soft tissue interferes with crown seating
When placing the impression coping, there are times when a bit of tissue gets pinched between the coping and the implant. This will result in an incorrect impression of the implant. This may also happen when placing the final crown. The crown will, of course, be high since it is not fully seated on the implant.
Another soft-tissue issue is the fact that the average healing abutment and impression coping are the same diameter as the implant. The lab may pour a soft-tissue model that has a small diameter hole for the restoration, which does not allow for emergence or thickness of any kind. This is the reason why lab techs will remove the soft-tissue material from the model. Then, they can contour a correct emergence profile crown for insertion. By removing the soft tissue, the tech can ensure that the crown seats and is designed properly. The soft tissue can then be replaced on the model to make sure the crown's emergence is consistent with the teeth in the mouth and they’re not overcontoured.
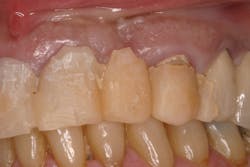
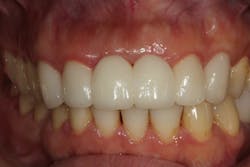
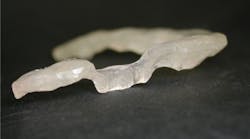
The only other way to make sure the crown is seated is to use a high-speed handpiece to remove all the stone around the implant. This prevents the ability to see how the crown looks with the soft tissue, since it was eliminated. When the crown is being inserted, the narrow space for the healing abutment must be pushed out. The emergence of the crown will prevent it from fully seating. If the dentist does not take an x-ray, he/she will automatically think the crown is high. If the occlusion is removed to seat the crown, it will appear to be in correct occlusion even though the crown is not seated and could loosen in the future. Making a temporary beforehand that slowly contours to the tissue will establish a nice profile and make this whole procedure much easier, since the soft tissue will have been contoured by the temp to accept the final crown (figure 3).Conclusion
The dentist and lab must work together to deliver accurate crowns. Direct communication with the lab tech will result in a team effort to address the reason for incorrect crowns. It is not the dentist's fault or the lab's fault—it is a result of circumstance. The best way to fix these problems is to address each patient at each stage, including preparation, impression, temp, staff, delivery service, material used for models, and restoration. One of these things will end up being the culprit that can be addressed and resolved.
Also by the author—
- Top 5 questions you should ask a lab before you send them a case
- Prevention of titanium base debonding and failure
- Factors to consider when choosing between a bar versus a Locator implant overdenture
- How to use a dental implant verification jig to ensure an accurate final framework every time
Editor’s note: This article originally appeared in Perio-Implant Advisory, a chairside resource for dentists and hygienists that focuses on periodontal- and implant-related issues. Read more articles and subscribe to the newsletter.
