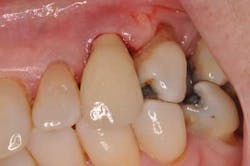
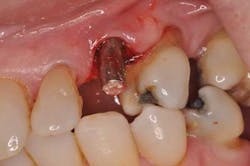
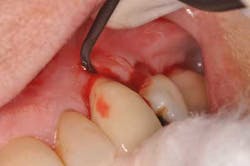
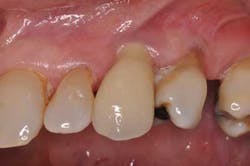
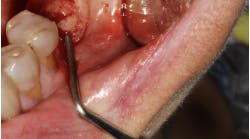
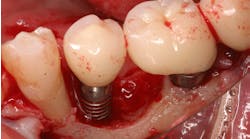
A new patient presents to my office with a chief complaint: “My implant crown fell off yesterday.” She’s a 72-year-old woman with noncontributory medical history. She states the implant in tooth position No. 11 was placed “a few years ago and never felt right.” Examination reveals a prefabricated abutment of some sort that is not mobile. Curiously, the peri-implant gingiva has a slight erythema. Moderate bleeding is noted upon insertion of the implant crown.
Fig. 1: Implant crown seated.
Fig. 2: Moderate bleeding noted around prefabricated abutment after crown is removed.
Let’s consider the following courses of action:
- Recement the crown and put the patient on a course of antibiotics.
- Use a laser or scalpel to remove any erythematous gingival tissue that has grown around abutment, and then recement the crown.
- Debride the implant sulcus with implant-friendly instruments, recement the crown, and then follow up with the patient in two weeks.
Which did you select? That’s right, the correct option is 4. — Take a darn radiograph before you do anything, buddy.
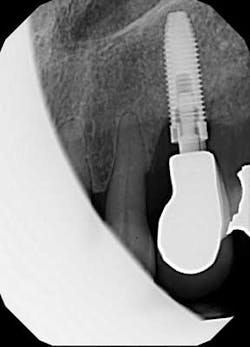
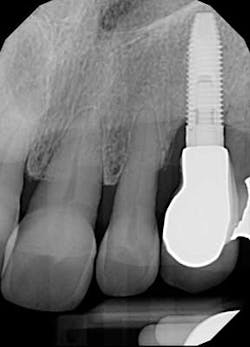
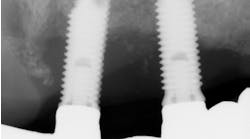
We seat the crown and take a periapical radiograph and find something odd.
Fig. 3: Periapical radiograph.
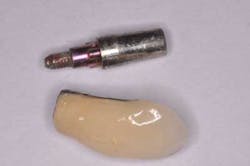
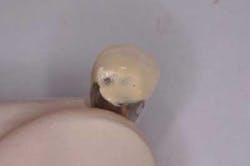
Looks like the original restorative dentist never fully seated the abutment! Perhaps that would explain why the patient believed the crown “never felt right.” We remove the abutment and see that there are no restorative margins to speak of, just a standard, prefabricated abutment that was used right out of the package. Since there is no sign of radiographic bone loss, the gingival erythema is diagnosed as peri-implant mucositis.
Fig. 4: Abutment and crown.
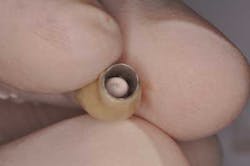
I wondered to myself ... If the abutment was never fully seated, that would mean the crown was never fully seated. If the crown was never seated, how was the patient able to occlude on her other teeth? Then I took a closer look at the lingual surface of the crown.
Fig. 5: Lingual surface of crown.
So the dentist torqued down a nonseated abutment, then wondered why the crown was too high. Then he or she probably blamed the lab for making a “bad” crown and ground down the porcelain until the patient could fully occlude. Oh, boy.
I choose to keep the abutment and crown, seat them correctly, cement the crown with a retrievable cement, and monitor the patient in two weeks. After seating the abutment fully, I seat the crown and take a radiograph for confirmation.
Fig. 6: Periapical radiograph after correct seating of components.
A temporary cement (Premier Implant Cement) is selected so that the restoration will be retrievable if and when necessary. This cement is also radiopaque so as to allow radiographic detection of any excess. A small amount is applied to the internal aspect of the crown. An implant-friendly scaler made of graphite (Premier Universal Implant Scaler) is used to remove any excess cement after seating. Bleeding is anticipated due to the original erythema that was present.
Fig. 7: A small amount of implant cement applied inside the crown.
Fig. 8: A graphite scaler can remove any excess cement. Bleeding is visible due to the peri-implant mucositis.
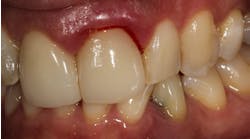
The patient returns for a two-week follow-up and the gingival erythema is absent. Oral hygiene instruction is reviewed as there is still visible plaque on the adjacent teeth. Probing of the implant reveals no bleeding, thus the peri-implant mucositis appears to have been successfully treated.
Fig. 9: Two weeks after initial presentation, peri-implant mucositis appears to have subsided.
Author bio
Chris Salierno, DDS, is a general dentist practicing in Melville, N.Y., and co-editor of Surgical-Restorative Resource e-newsletter. He lectures and writes about practice management and clinical dentistry. Additional content is available on his blog for dentists: www.thecuriousdentist.com. You may contact Dr. Salierno by email at [email protected].

