Step-by-step procedure to simplified and efficient root canal techniques
There are many dentists I’ve met who are great and efficient at performing root canals daily in their practices. However, many more dentists shy away from performing root canals, refer out all molar cases, and don’t see the procedure as being profitable for their practices at all.
When applying to dental schools, we were all asked to write in essays and discuss during interviews “Why do you want to become a dentist?” Most of us responded: “Because I want to help people.” I’ve found no greater satisfaction as a dentist than to help someone who is suffering from terrible discomfort.
After the first five years of private practice, dentistry has pretty much become a routine. The times that still stand out the most are when I get a chance to help someone out of excruciating pain or change a person’s life dramatically by giving him or her the smile he or she has always wanted. I’m a general dentist, and root canals are one of the procedures I enjoy performing the most. Root canals have become a predictable and efficient part of my practice. Let me explain.
ADDITIONAL READING | Dismay with kid decay: treatment options for broken down permanent teeth in the mixed dentition
A practice builder
Although many of these patients will first come in for an emergency visit, many will stay to become loyal patients in the practice. Although I will not disparage their previous dentist, it’s not uncommon for patients to hold a grudge against their last dentist, who couldn’t see them for an emergency visit or does not perform root canals. These patients are impressed that I was able to fit them in on short notice and performed the root canal efficiently and pain free. Some of these patients have switched their insurance just so they could continue coming to our office. They feel comfort knowing that in an emergency, they’ll know where to go for help.
I’d like to share how this dental office has made root canals efficient, profitable, routine, and stress free. I have no interest in promoting any products, but I will mention products that I use. I don’t believe in ever working rushed; however, our systems and proficiency have reached a point where most root canals are completed within an hour.
ALSO BY DR. PETER MANN |Dental implants: The importance of patient compliance with immediate loading
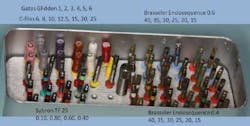
Armentarium
As a general dentist, my assistants have to be able to set up an operatory within five minutes. It would be a waste of resources to allocate an entire operatory just for a root canal procedure. Our setup is small, but it has everything we need. By the time the patient is fully numb, we have to start working on the problematic tooth.
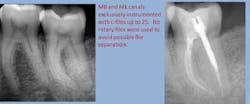
The Sybron Twisted Files (TF) serve as the workhorse for instrumentation. I’ll use them for most of my instrumentation, because they’re extremely flexible and will rarely separate. Using the crown-down technique, the 0.04 mm file should reach most canals to working length.
The only hand files in my setup are the C-files. Used for approaching a curved or calcified canal, I found having a 12.5 mm C-file in my armamentarium is important. A canal that’s very calcified is easier to instrument in smaller increments. Roydent makes 12.5 mm C-files.
The Brasseler EndoSequence files are used to finish instrumentation for a single cone fit.
Gates Glidden drills are used to open the orifice of each canal to achieve good access.
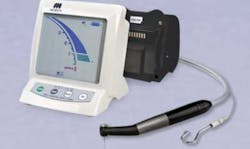
The Morita Root ZX II with the attached low-speed handpiece is a terrific device. When it senses too much torque is being applied on the file, this handpiece will start rotating back and forth in 90-degree quarter-turns. This greatly helps avoid file separation. Having a rotating file directly connected to the apex locator is very reassuring. The apex locator shows the working length every time the operator is instrumenting, which helps to ensure the operator does not over-instrument past the apex.
Additional instruments
- Basic set: endo plugger, endo explorer, endo spreader
- Irrigation: sodium hypochlorite (NaOCl), 17% EDTA, 2% chlorhexidine
- Thermal gutta-percha condensing pen
- AH Plus root canal sealer
Step 1: Access
Before starting the root canal, I will have a conversation with the patient and have him or her commit to a crown. That gives me permission to flatten the occlusal surface and take the tooth out of occlusion, usually with a football bur. Reducing the occlusal surface creates easier access and reduces post-op discomfort.
Using either a round or football bur, open the pulp chamber. With an endodontic explorer, locate all the canals in the chamber.
Once the canals are located, I’ll use a 0.10 Sybron TF rotary file to enlarge the coronal third and remove pulp tissue. Now that the canals are visible, widen the coronal portion further using Gates Glidden. Flaring the coronal portion is vital to preventing file fractures and ensures adequate instrumentation and irrigation during the procedure. All of the canals should be easily visible for good access.
Step 2: Instrument and irrigate
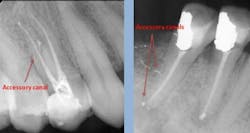
The single most important factor for predictable root canals is irrigation. Copious irrigation after every file is a must. Instrumentation is not nearly as important as good irrigation. A file cannot reach every aspect of many canals to remove all of their nerve tissue. The key to removing tissue from accessory canals is irrigation. Irrigation will dissolve soft tissue and destroy the bacteria inside the tooth that’s hidden within accessory canals. I will usually go through at least 25 cc of sodium hypochlorite (five syringes of 5 cc each) for every RCT + 5 cc of EDTA + 5 cc of 2% chlorhexidine).
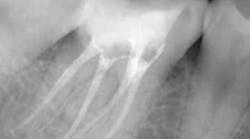
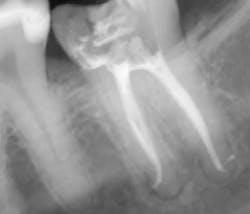
Once all of the canals are found, I will go through the series of Sybron Twisted Files size 25 tapering from 0.10 to 0.80 to 0.60 to 0.40. The 0.40 file should reach the working length for most canals. On a large palatal or distal canal, the 0.60 TF will usually reach working length. After which, using the crown-down technique with the Brasseler EndoSequence rotary files, instrument each canal until files reach the working length. Once instrumentation is complete, take a P.A. with gutta-percha to confirm instrumentation to working length. I find it much easier to take working length films with gutta-percha rather than files (which may fall out, bend, or separate)
Many times, I will not pick up a hand file. But if the canal is curved or calcified, I may exclusively use hand files. The only files in my armamentarium are the C-files. They’re so versatile that I haven’t found the need to include any other types of files.
Calcified canals
When approaching a calcified canal or a canal that’s curved and narrow, the C-files become a very important instrument. Sometimes, if the curve is very significant, I won’t use rotary files at all.
Step 3: Obturate
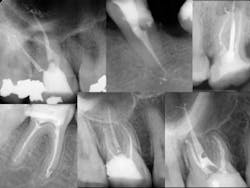
Canals are carefully dried with paper points. Insert the gutta-percha with AH sealer in the canal to working length, and take it back out. Add additional sealer to the gutta-percha, and then in a gentle pumping motion insert gutta-percha back to working length. Sear off access with a thermal pen and apply gentle pressure with a condenser.
Using a pumping motion and adding additional sealer ensures that voids within the canals get filled. This generates the “puff” effect with small amount of sealer being extruded from the apex of canals. It also helps ensure accessory canals are not left unfilled.
Complications:
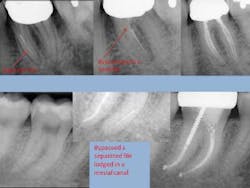
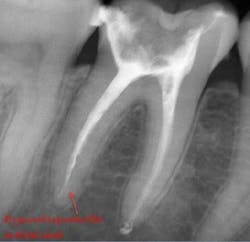
- Separated file — The dreaded separated file is probably the most common complication clinicians encounter when performing root canals. There was a time when those broken instruments made me wish I never started the root canal in the first place. These days, I will work to bypass the file and get a predictable result.
To prevent file fractures, irrigate after every file. Also, apply gentle pressure and never push when instrumenting a canal.
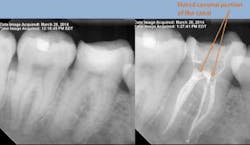
If a file separates, take a P.A. film immediately to figure out where in the canal the file is lodged. Most likely there’s a curve that the file could not negotiate. Start negotiating the canal with a 6 or 8 C-file. The goal is to engage the space around the file where you can instrument next to it. It could take an extra 30 or 40 minutes and lots of irrigation, but you should be able to negotiate the canal with a 15 file to working length. Irrigate very well and obturate. Sometimes the file will actually exit the orifice of the tooth when irrigating. But it’s perfectly reasonable to use the file as part of the fill.
- Sodium hypochlorite accident — Sodium hypochlorite accidents usually result from instrumenting a canal past the apex and sodium hypochlorite exiting the apex. This will result in immediate swelling to the patient’s face. It’s a scary outcome for both patient and clinician.
If a sodium hypochlorite accident occurs, irrigate as soon as possible with saline. Place a cold compress on the patient’s face. Reassure your patient that he or she will be OK, and prescribe antibiotics and painkillers. The next day the patient will look as if he or she had trauma to the facial area with a lot of swelling and inflammation. This will resolve, but initially it will look a lot more severe than it is. Reassure the patient that everything will return to normal. In these situations, a good doctor/patient relationship is critical in avoiding litigation.
