Denture conversion: a step-by-step protocol
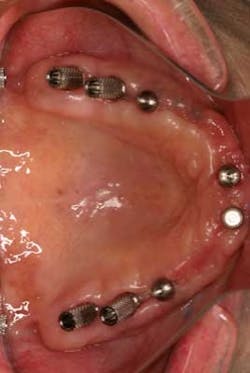
By Neil Cohen, DMDThis is a case that details the steps involved in converting a full upper denture into a fixed detachable provisional prosthesis. This cost-saving procedure utilizes the patient’s existing denture, eliminating the need to create a new implant-supported provisional. This procedure also maintains the patient’s vertical dimension of occlusion as well as helps the clinician evaluate comfort, function, and esthetics in order to design the final restoration. Here is a step-by-step protocol for denture conversion.Protocol for denture conversionOnce the dental implant fixtures are integrated, we begin our evaluation. Interach space is evaluated to ensure sufficient room for a fixed prosthesis. Hopefully, as in this case, there is good symmetry of the implant fixtures. The healing abutments have been in place for several weeks, and the transitional denture had been relined to properly fit over the abutments and soft tissue (Figs. 1 and 1a).
Fig. 1
Fig. 1aThe occlusion, lip support, incisal edge position, and speech were all satisfactory with the denture. This allows me to use the existing denture prosthesis and convert it to a fixed detachable provisional. When the procedure is completed, the denture will be a screw-retained acrylic provisional with the buccal flange and palatal acrylic removed.I start by removing only the four posterior healing abutments. A metal provisional abutment is attached to each of the four posterior abutments (Figs. 2 and 2a).
Fig. 2
Fig. 2aThe denture is then trimmed to allow the metal abutments to pass completely through the denture (Fig. 3).
Fig. 3Once a passive fit is achieved, the patient is asked to close into occlusion. If any of the metal abutments are too tall, the height can be trimmed so that the occlusion can be established. The patient should able occlude properly with the modified denture and provisional metal abutments in place (Fig. 4).
Fig. 4In order to connect the denture to the metal abutments, a cotton pellet is placed in the chimney access of each provisional abutment (Fig. 5).
Fig. 5Using a plastic monoject syringe, acrylic is then injected around the abutments. The cotton pellet helps prevent acrylic from getting stuck inside the abutment. Once the acrylic has set completely, the cotton pellets are removed and the abutments can be unscrewed. The denture will come loose with the metal abutments integrated into the denture. The same process is then repeated for the four anterior abutments.The denture is now removed with all eight provisional metal abutments attached (Fig. 6).
Fig. 6The excess acrylic can be trimmed and any voids are filled in. The buccal flange and palatal acrylic are now removed (Figs. 7 and 7a).
Fig. 7
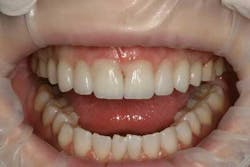
Fig. 7aThe removable denture that the patient came in with earlier that day has now been completely converted to a fixed provisional prosthesis. The occlusion has been maintained throughout all of the procedures. The provisional abutments have been hand-torqued, and the access has been sealed with a cotton pellet and IRM. Here we can see the patient with the converted provisional (Figs. 8 and 8a).
Fig. 8
Fig. 8aIt does not look remarkably different from the denture, and if the goal was to maintain the soft-tissue appearance and esthetics of the denture, then we are happy it looks similar. The function of this prosthesis, however, is notably different and provides the patient with a significant improvement in support, stability, and retention (Fig. 9).
Fig. 9After wearing the fixed detachable provisional for eight weeks, the patient can provide helpful feedback regarding the esthetics, comfort, and function of the prosthesis. Any necessary adjustments can be made. Ultimately, a well-designed provisional will serve as a template for the laboratory technicians as they begin to fabricate the final prosthesis. The patient is now ready for final impressions.Author bioDr. Neil Cohen received his BS from the University of Wisconsin – Madison with a major in biology. He continued on to receive his DMD from the University of Pennsylvania, where he was the recipient of the Earle Banks Hoyt Teaching Award for his dedication and commitment to dental academics. He completed his three-year specialty training at the University of California – San Francisco, earning a certificate in advanced prosthodontics. Dr. Cohen lectures on topics addressing abutment screw loosening, immediate vs. delayed loading of implants, and space considerations in implant prosthetics. Dr. Cohen maintains a private practice in New York City.


