When orthodontics falls short: Managing diastemas with porcelain veneers
Patient presentation and case acceptance
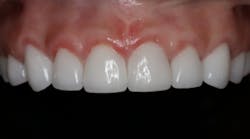
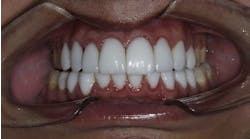
A patient presented to me at the end of her orthodontic treatment with diastemas, enamel defects, tooth-arch size discrepancies, and teeth that were nonproportional (figure 1).
Figure 1: The patient at presentation.
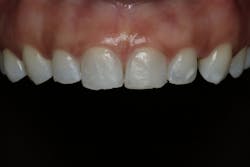
She wanted to remove her braces because therapy was taking too long and the correction proposed by the orthodontist was going to take additional years. Further, her orthodontist mentioned that the spaces between her teeth would never close completely (figure 2). Due to these factors, this patient opted for a prosthetic solution.
Figure 2: The patient was unhappy with the diastemas that were still present after orthodontic treatment.
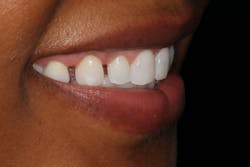
After several consultations, she decided to have her braces removed and discontinue orthodontic treatment (figure 3).
Figure 3: The patient opted to stop orthodontic treatment and accept a treatment plan for a prosthetic solution.
Treatment was accepted in the form of eight porcelain veneers from teeth Nos. 5 through 12 in order to close all of the spaces between her teeth and not create teeth that were too long and wide if fewer teeth were restored. It is imperative that the clinician and patient arrive at a mutual agreement on the number of teeth needing to be restored to satisfy the esthetic demands. This conversation can usually be achieved after a diagnostic wax-up is taken.
Case study: Porcelain veneers to correct large diastemas
It is important to ensure that the size of the teeth look proportional for an ideal width-to-height ratio. The ideal width of a restored tooth should be 75% of its height. In this case, the gingival height needed to be increased by 1 mm and the incisal length by another 1 mm to make the tooth look ideal.
Once I obtained the information I needed, I took the mold for a diagnostic wax-up. The patient assisted in selecting the shape of her teeth in the wax-up. Then, I sent the patient, along with a surgical guide, to the periodontist for esthetic laser closed-flap crown lengthening. I also recommended making a tooth preparation guide from the wax-up as this will greatly assist the clinician while the teeth are being prepared. The preparation guide assures the clinician that adequate tooth structure is removed.
When all eight teeth were prepared, a hydrophilic polyvinyl impression material (Take 1 VPS impression material, Kerr) was used. The teeth were cleaned with chlorhexidine for 15 seconds and air-dried. Then a coat of desensitizer (Gluma, Kulzer) was placed on the teeth to minimize any postoperative sensitivity.
From the wax-up, a polyvinyl putty was made to help fabricate the provisional. Using a methacrylic ester composite material, Luxatemp (DMG America) bleach light shade, was injected into the polyvinyl putty and placed in the mouth for two minutes to lock in the temporary. Then, the mold was carefully removed with the composite attached to the prepped teeth.
Next, the composite was trimmed and polished. This is a very important step because the patient has a preview of the ideal wax-up in the mouth. Both the clinician and the patient can determine what the final veneers will look like at this stage. The esthetics, phonetics, and bite can be inspected and changed before the final restoration is made from the dental laboratory.
When the patient returned for the subsequent visit, anesthesia was administered and the composite provisionals were removed. The veneers were tried in for verification of fit and esthetics. A rubber dam (OptraGate, Ivoclar Vivadent) was placed and the cementation process began. The veneers were placed with a try-in gel and the patient approved the esthetics, color, and shape of the veneers. The patient then signed off on the consent form for cementation of the veneers—a very important step in the verification process, because once the veneers are cemented, changing them can be laborious and costly. If you are performing a similar procedure, be absolutely certain your patient is satisfied with the look of the veneers before this stage in the process.
The try-in gel was thoroughly rinsed out and the teeth were air-dried. Phosphoric acid was placed inside each veneer for at least 30 seconds to acidify the porcelain and then rinsed. The veneers were air-dried and a silane primer (Kerr) was placed, brushed thin, and allowed to air-dry for one minute. Then, an adhesive (OptiBond FL, Kerr) was placed and air-dried. The veneers were covered up in a box to prevent light exposure on the inside of the veneer to protect them from premature curing.
After the rubber dam was placed, the teeth were cleaned with chlorhexidine (Ultradent) for 15 seconds and rinsed. The teeth were then etched with 35% phosphoric acid (Ultradent) for 20 seconds. Then a coat of desensitizer was placed on the teeth to minimize any postoperative sensitivity. A single coat of adhesive (OptiBond Solo Plus, Kerr) was placed on the prepped teeth. After the excess solvent had evaporated, the teeth were light-cured (OptiLux 501, Demetron/Kerr) for 10 seconds per tooth.
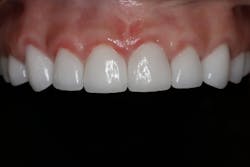
After placing a light-cured shade clear cement (NX3 Nexus Third Generation cement, Kerr) on all eight veneers, the excess luting cement was cleaned off and all veneers were tacked into place at the gingival crest. It is critical to be sure that the curing light is directed apically so that there is no premature curing interproximally. After the veneers were tacked into place, the teeth were carefully flossed and all excess cement was cleaned off (figure 4). The bite was checked for proper occlusion.
Figure 4: The patient with final veneers used to correct large diastemas.
The outcome
Correcting large diastemas with porcelain veneers requires careful interdisciplinary treatment planning. It is imperative that the clinician has extensive knowledge in the area of smile design and case preparation to achieve a successful outcome and be assured of a happy patient (figure 5).
Figure 5: A successful outcome and a happy patient.
